A dull woodturning chisel doesn’t just slow you down—it ruins cuts, burns wood, and makes turning feel like a fight. Keeping tools sharp transforms the whole experience. Cuts glide, surfaces finish cleaner, and your control increases instantly. Skilled turners know that sharp tools matter more than expensive tools, and the good news is anyone can maintain a razor-edge with the right method.
Below is a complete walk-through that helps you sharpen woodturning chisels confidently, whether you use a bench grinder, sharpening system, or handheld stones.
Why Sharp Woodturning Chisels Matter
Clean, controlled cuts come from a fresh, consistent edge. When your gouge or skew is properly sharpened, it removes wood effortlessly instead of scraping. This boosts safety too—sharp tools require less pressure, which reduces catches and chatter.
Real-world example:
A bowl gouge that’s slightly dull forces the turner to push harder. That pressure often leads to bumpy surfaces and tool marks. A freshly honed edge needs only light contact, producing smooth ribbons and crisp shaping.
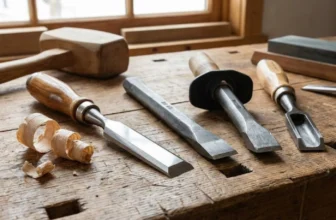
Understanding the Different Woodturning Chisels
Each type of chisel has its own ideal bevel angle and sharpening style. Keeping these consistent improves muscle memory and cut quality.
Common Woodturning Tools and Their Typical Bevel Angles
| Tool Type | Typical Bevel Angle | Notes |
| Bowl Gouge | 40–60° | Swept-back “Irish grind” adds versatility |
| Spindle Gouge | 35–45° | Great for beads and coves |
| Roughing Gouge | 40–45° | Not for bowls; only spindle work |
| Skew Chisel | 25–35° | Requires careful honing |
| Parting Tool | 50–60° | Can be honed quickly |
Preparing for Sharpening
Good sharpening starts with the right setup. A stable work area and the correct abrasives keep the process easy and repeatable.
Bench grinders are the most common sharpening tool for turners. Many pair them with jigs such as the Wolverine system for accuracy. If you prefer water stones or diamond plates, those work too—they just take longer and require more practice to maintain angles by hand.
Before starting, check your wheel condition. A glazed or out-of-round wheel leads to poor results, so dress it if needed.
Step-by-Step: How to Sharpen Woodturning Chisels Properly
Step 1: Set Your Sharpening Angle
Consistent angles are the secret to professional-quality sharpening. Using a jig ensures your bevel matches every time, preventing uneven edges.
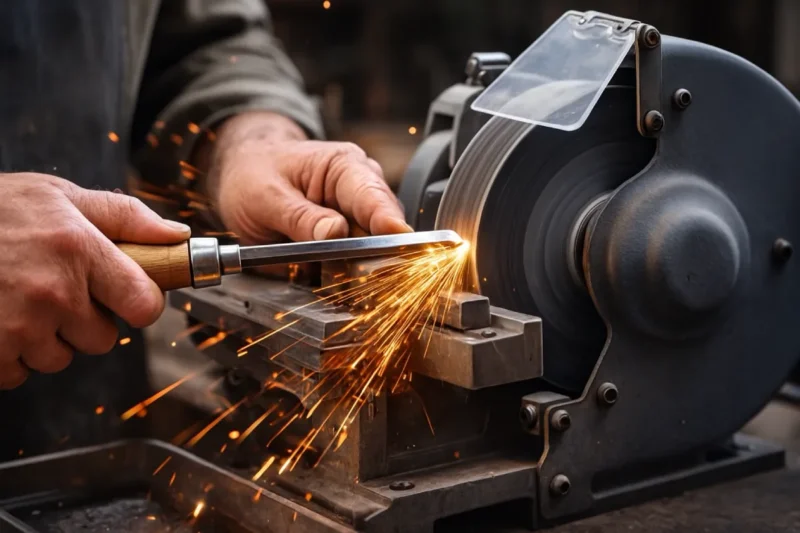
Position the tool so the bevel rests flat on the grinding wheel. If you see sparks all along the edge evenly, you’re in the right spot. If not, adjust.
Step 2: Begin Grinding With Light Pressure
Light pressure is key. Heavy pressure overheats steel and reduces tool life. Aim for a gentle contact that lets the wheel do the work.
Move smoothly side to side if shaping a gouge. Keep your wrists stable and let the jig guide the motion. You should see a consistent, shiny bevel develop.
Step 3: Cool the Edge Frequently
Sharpening generates heat rapidly, especially with high-speed grinders. Dip the tool in water every few seconds. A cool tool keeps its temper and stays stronger over time.
If you notice the steel turning blue, stop immediately and cool it. That discoloration indicates overheating.
Step 4: Check the Bevel and Cut Quality
After grinding, inspect the bevel. You want a clean, even surface with no flat spots. A quick visual test: hold the tool under light—if you see a reflection on the cutting tip, it’s still dull.
For gouges, check that both “wings” match in length and curve. Symmetry maintains predictable cutting action.
Step 5: Hone to a Razor Finish
Grinding forms the edge, but honing refines it. A diamond card or slipstone works perfectly for this.
For skews and spindle tools, a polished bevel dramatically improves slicing cuts. For bowl gouges, honing the inside flute with a small diamond hone removes burrs and sharpens the cutting point.
This final touch is what elevates a tool from “sharp” to “effortless.”
Sharpening Bowl Gouges: A Closer Look
Bowl gouges see the most action, so they need frequent sharpening. Many turners refresh their edge every 5–10 minutes of cutting.
Aim for a swept-back profile if you want versatility. It excels at rough shaping, smoothing, and detail work. Use a jig to maintain both side wings evenly. Rotate the handle smoothly while sliding side-to-side. The rhythm eventually becomes natural.
Real-world example:
A turner shaping a deep bowl may sharpen the gouge five times during the roughing phase alone. Instead of speeding through the rough shape, pausing to refresh the edge saves time because each pass removes wood cleaner and faster.
Sharpening Skew Chisels Without Fear
The skew intimidates many turners, but a properly sharpened skew is a joy to use. It slices cleanly and produces glass-like surfaces on spindle work.
Keep the bevel long and consistent. When sharpening a skew, hold it firmly so the bevel stays flat on the wheel. Grind both bevels equally and finish with a polished hone for the cleanest cuts.
Maintaining Your Sharpening Equipment
Well-maintained sharpening tools make the entire process easier. Dress grinding wheels regularly to keep them flat and clean. Check jigs for loosened screws. Replace stones when they glaze or dish.
A quick maintenance routine saves effort in the long run, ensuring your edges stay consistent every time.
Suggested Maintenance Routine
| Task | Frequency | Benefit |
| Dress wheel | Weekly | Cleaner, faster sharpening |
| Hone tools | Every session | Polished, razor-sharp edge |
| Check jig setups | Monthly | Accurate bevel angles |
Helpful Tips for Better Sharpening Results
Small adjustments make a big difference. Here are some practical tips:
Avoid rushing. Sharpening slowly produces a more controlled edge.
Keep your grinder at eye level if possible. Seeing the bevel properly improves accuracy.
Refresh your edge early rather than waiting until the tool struggles. Frequent light sharpening always beats heavy grinding.
FAQ
Q: How often should woodturning chisels be sharpened?
A: Most gouges need sharpening every few minutes of active turning. Light, frequent touch-ups keep the edge performing at its best.
Q: Is a sharpening jig necessary for beginners?
A: While not mandatory, a jig helps achieve consistent bevel angles, making sharpening easier and more repeatable.
Q: Can woodturning chisels be sharpened on a belt sander?
A: Yes, but it requires a gentle touch. Belt sanders remove material quickly, so control becomes essential.
Q: What is the most important sharpening angle for woodturning?
A: There’s no single perfect angle. Each tool type has a recommended range, and consistency matters more than the exact number.
Q: Do I need to hone after grinding?
A: Honing isn’t required, but it significantly improves the final cutting edge, especially for skews and spindle tools.
Q: Why does my chisel edge burn during sharpening?
A: Excessive pressure or a glazed wheel causes overheating. Reduce pressure and cool the tool frequently.
Q: Should beginners reshape their gouges themselves?
A: Minor adjustments are fine, but large reshaping is best left for experienced turners or done slowly with careful practice.
Conclusion
Sharp chisels make woodturning smoother, safer, and far more enjoyable. With a reliable process in place, your tools stay consistent, your cuts improve, and your confidence grows each time you approach the lathe. Sharpening isn’t a chore—it’s part of the craft.
If you’re ready to upgrade your turning results, start by refining your sharpening routine today. A sharper tool truly transforms everything.
Ready to improve your turning projects? Let me know if you want a printable sharpening checklist or tool recommendations!


I'm Daniel Silva, writter of Toolsroute. We believe in empowering people with insanely detailed information to make woodworking a happier, safer, and more productive hobby.